
XWiki in the cloud
Posted on 06 Apr 2012 | Back to Bitloom home
The XWiki Platform Cloud is a project I contributed to develop in the context of research activities we are doing at XWiki.
It is an extenstion that allows XWiki to be deployed on cloud environments.
There are two main ideas behind this extension:
-
To provide XWiki with the ability to dynamically configure itself by using parameters coming from the cloud environment.
-
To use services that are made available in the context of a cloud environment.
The first point is about the retrieval of configuration parameters that are usually passed using environment variables, either through the JVM or the operating system.
This is the case of Amazon Elastic Beanstalk (see later), but also of CloudFoundry and Heroku
Amazon Elastic Beanstalk allows the user to specify up to eight environment variables (i.e., AWS_ACCESS_KEY_ID, AWS_SECRET_KEY_ID, JDBC_CONNECTION_STRING, PARAM1 to PARAM5).
CloudFoundry uses environment variables to pass JSON encoded datastructures containing information about the services bound to the application, and their configuration parameters. Here, for example, you can look at a dump of the environment for a hello world application. If you search for VCAP_SERVICES you will see the JSON describing the services available to the application which include a mysql-5.1 service, running on a given hostname, exposing a database with a given name, that can be accessed by a user with a given username and a given password.
Heroku’s approach is similar to Amazon’s.
XWiki dynamic configuration
XWiki Platform Cloud introduces two components that allow to take advantage of environment variable for configuration:
- A configuration data source
- An Hibernate configuration provider API
The configuration data source is able to retrieve configuration keys also from the JVM and operating system environments. It is also able to perform variable remapping, which is the equivalent of having pointers in configuration files. We’ll see later how this is useful.
The Hibernate configuration provider API has a default implementation that dynamically build the Hibernate configuration file using the previously mentioned data source. It overrides all the properties found in the bundled hibernate.cfg.xml by using the values coming from environmental variables (retrieved using the configuration data source)
The remapping feature is useful in some cases when we have different properties with the same semantics.
This is the case of Amazon Elastic Beanstalk. The JDBC_CONNECTION_STRING is used to indicate the JDBC endpoint to connect to. This is exactly what connection.url property in the hibernate.cfg.xml file specifies. By using remapping we can tell to remap connection.url to JDBC_CONNECTION_STRING so that when the hibernate configurator will dynamically build the hibernate.cfg.xml to initialize XWiki, it will take the value of the connection.url property from the value of the JDBC_CONNECTION_STRING provided by the cloud environment.
The remapping.properties file shows the remapping that are used in the distribution built to be deployed on the Amazon Elastic Beanstalk
By defining appropriate remapping properties we can build distributions for different cloud environments, provided that there is a one-to-one correspondence between the semantics of an environment variable and an hibernate.cfg.xml property. This is not the case for CloudFoundry where an explicit hibernate configurator capable to parse the JSON file and extract the needed information should be provided.
The major advantage here is that your Web Application WAR always stays the same for a given cloud environment. You won’t need to touch any configuration file. What changes, in fact, are the parameters you provide to your application at startup using the cloud service’s UI and APIs.
Cloud services
Currently the XWiki Platform Cloud project provides the experimental support for storing attachments on a Amazon S3 compatible storage.
Deploying on Amazon Elastic Beanstalk
In the following sections I will detail the steps to deploy an XWiki using the Amazon AWS infrastructure and, in particular, the Elastic Beanstalk service. If you want to play with it, Amazon provides a free usage tier that allows user to instantiate virtual machines, databases, and so on for free, provided that certain constraints on their usage are met.
Create the application
The first step consists in uploading the XWiki WAR and create an application in the elastic beanstalk service.
- Go to the elastic beanstalk console
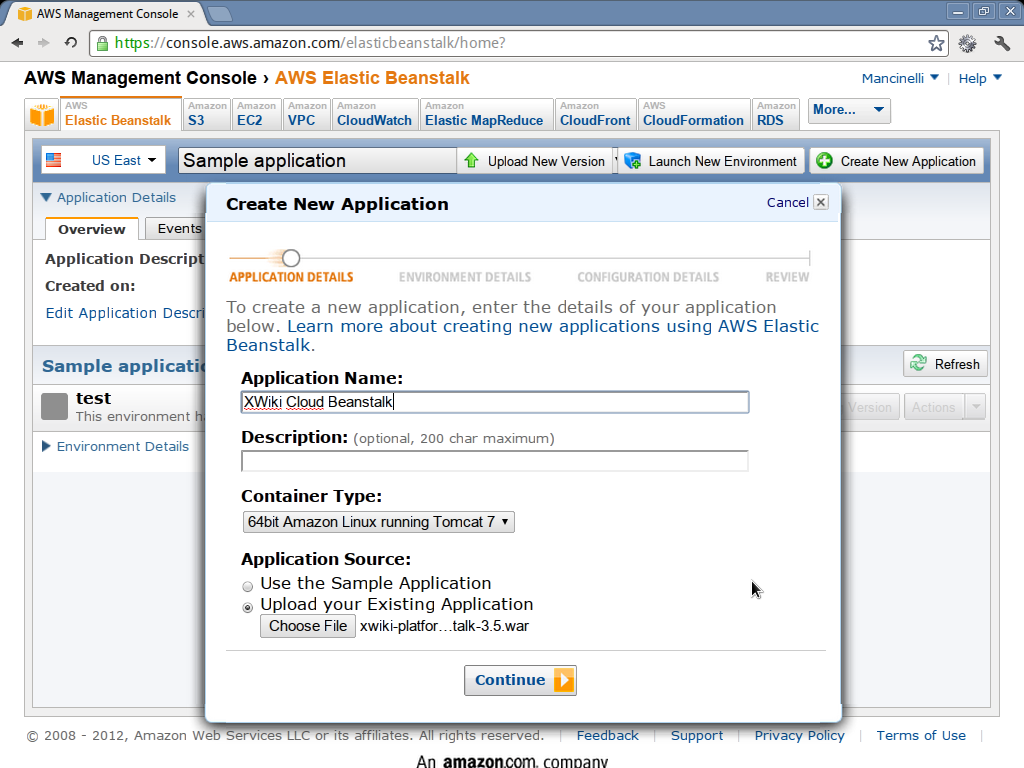
- Click on create new application
- Choose a name (e.g. XWiki Cloud Beanstalk)
- Select the 64bit Amazon Linux runnint Tomcat 7 container
- Choose the WAR file to upload. The WAR is the one generated by buidling the xwiki-cloud-platform project.
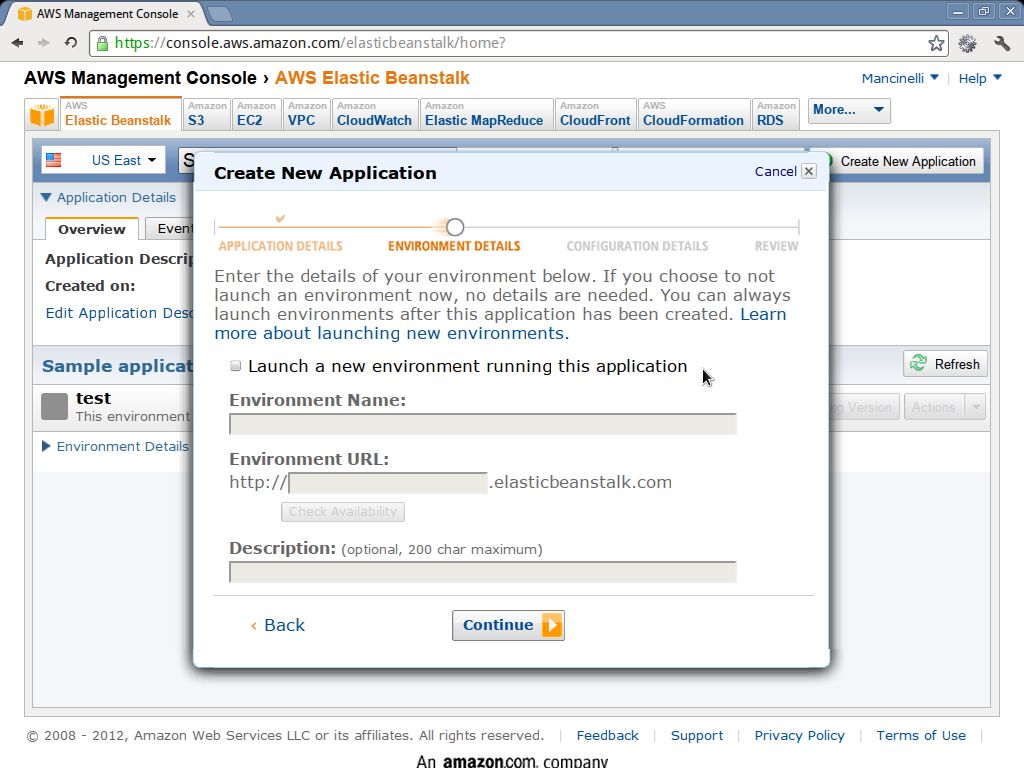
- In the next screen uncheck the launch new environment running this application
- Finish the next steps.
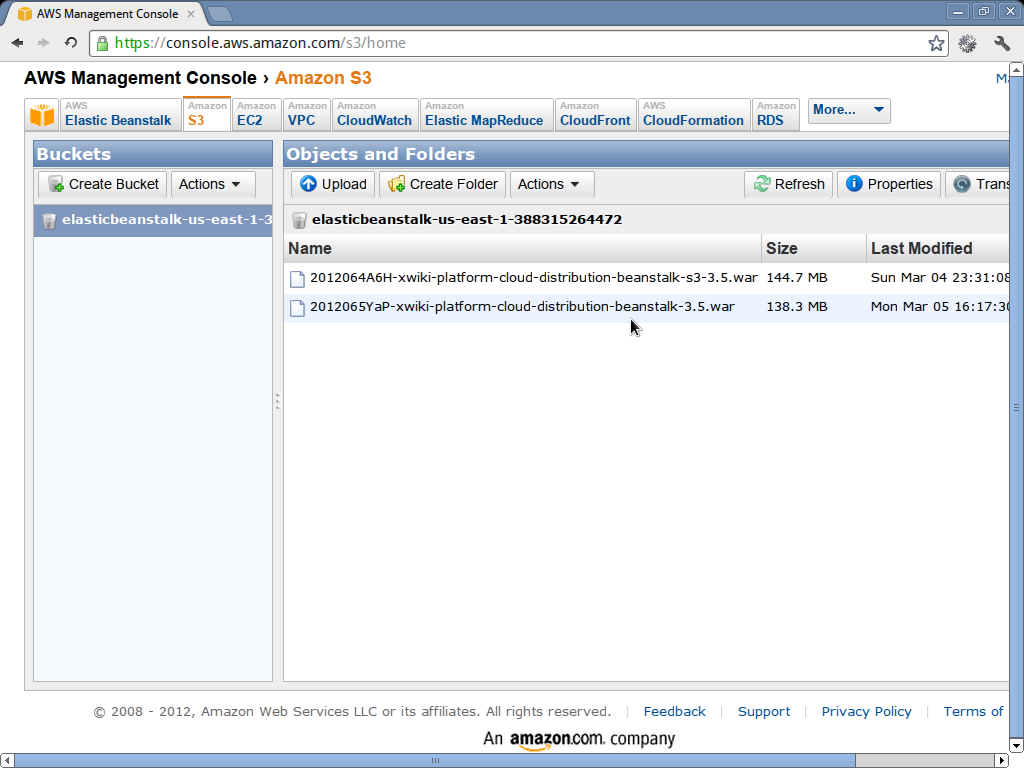
- At the end of the upload, if you go to the S3 console, you will see the XWiki WAR available in a bucket.
The following pictures show what you are expected to see during these phases (click on them for a larger version).
Setup the database
In order to make XWiki store its data, we will use the Amazon RDS service which allows to instantiate and manage a relational database. We will use MySQL.
Create the parameter group
We need to tweak the default MySQL configuration in order to be able to upload and store large files. In particular we need to set the max_allowed_packet parameter to a larger value, as indicated in the XWiki MySQL installation guide
Amazon RDS allows users to provide custom configurations by using parameter groups. Unfortunately there is no UI for doing this in the web management console, so we’ll need to use a terminal.
In the following ACCESS_KEY and SECRET_KEY are your Amazon AWS keys that you can retrieve on the security credentials page
- Download and install the RDS developer tools. It should be enough to download and unzip the
RDSCli.zipfile and set theAWS_RDS_HOMEenvironment variable to the directory where you unzipped the file) - Create a new parameter group called
xwikiusing the command:rds-create-db-parameter-group xwiki -I ACCESS_KEY -S SECRET_KEY -f mysql5.5 -d "XWiki" - Modify the
max_allowed_packetin thexwikiparameter group using the command:rds-modify-db-parameter-group xwiki -I ACCESS_KEY -S SECRET_KEY -p "name=max_allowed_packet,value=16776192, method=immediate" - If everything went well, you will be able to see the
xwikiparameter group in the web management console
Setup the security group for RDS instances
RDS uses Amazon EC2 to provide the actual infrastructure. EC2 virtual machines are configured using security groups that allow a system administrator to define which ports should be open to the outside world.
In order to allow connections to the DB server we need to open the MySQL port, which normally is 3306. To do this we need to perform the following steps:
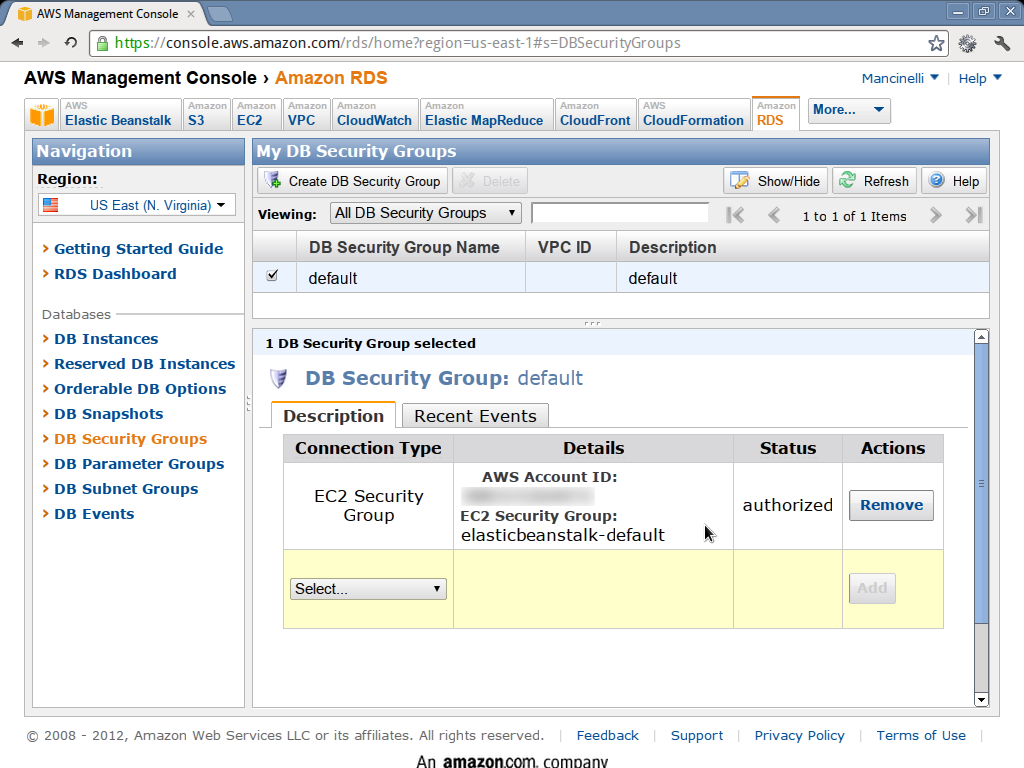
- Go to the RDS security groups console.
- Click on the
defaultsecurity group. - In the bottom part of the page, select the
EC2 security groupsin the dropdown list. - Select
elasticbeanstalk-defaultin the dropdown list that will appear next to it. - Click Add.
- After a while you should see an
Authorizedstatus.
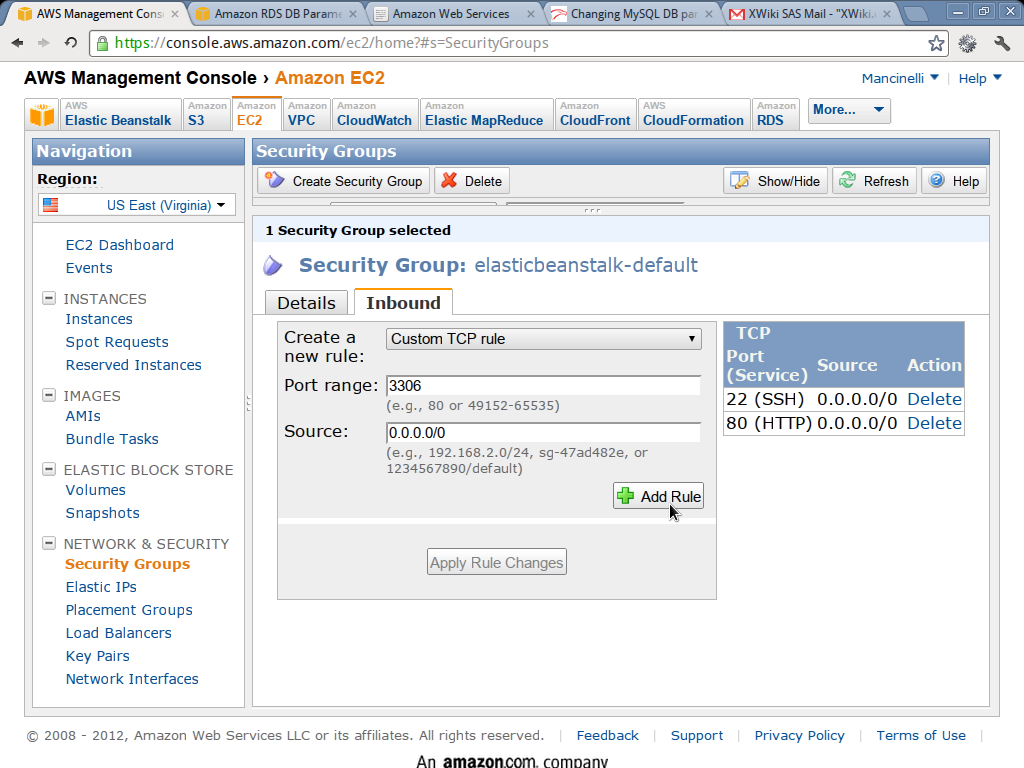
At this point, by default, RDS database instances will use the elasticbeanstalk-default security group, defined in EC2. Now we need to open the MySQL port by modifying the elasticbeanstalk-default security group:
- Go to the EC2 security groups console and click on
elasticbeanstalk-default. - Select the inboud tab.
- Write
3306in the port range field. - Click Add rule.
- You should see
3306 (MYSQL)in the table on the right.
The following pictures show what you are expected to see during these phases (click on them for a larger version).

Create and start the database server
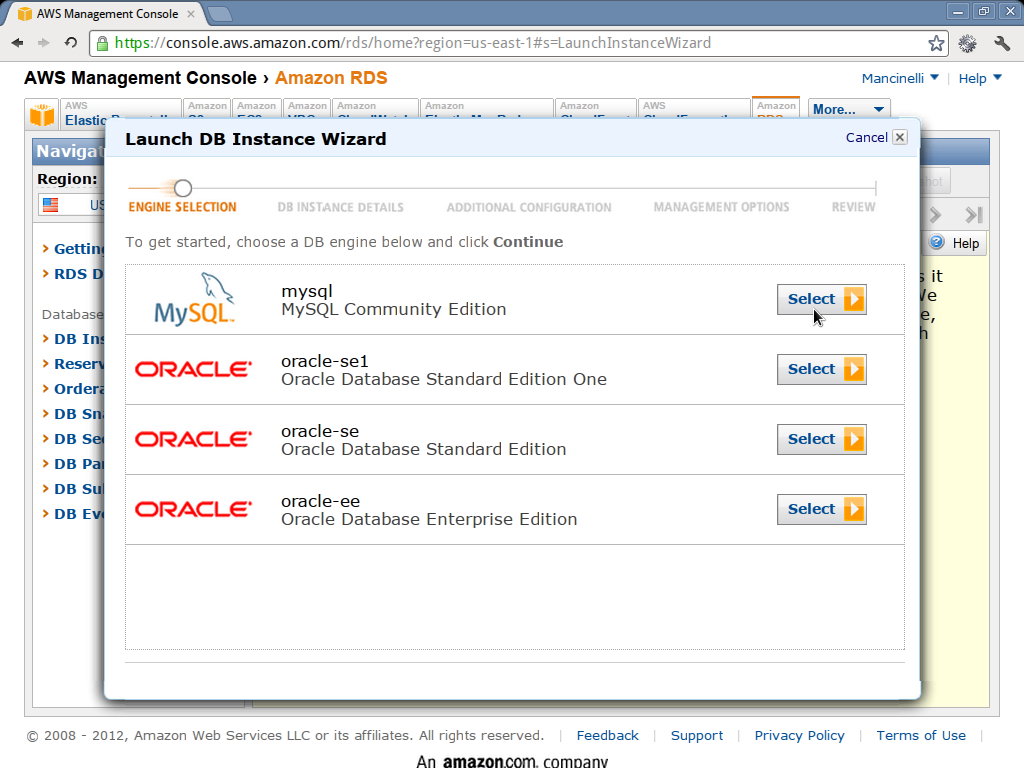
- Go to the RDS console and click on Launch DB instance
- Select MySQL
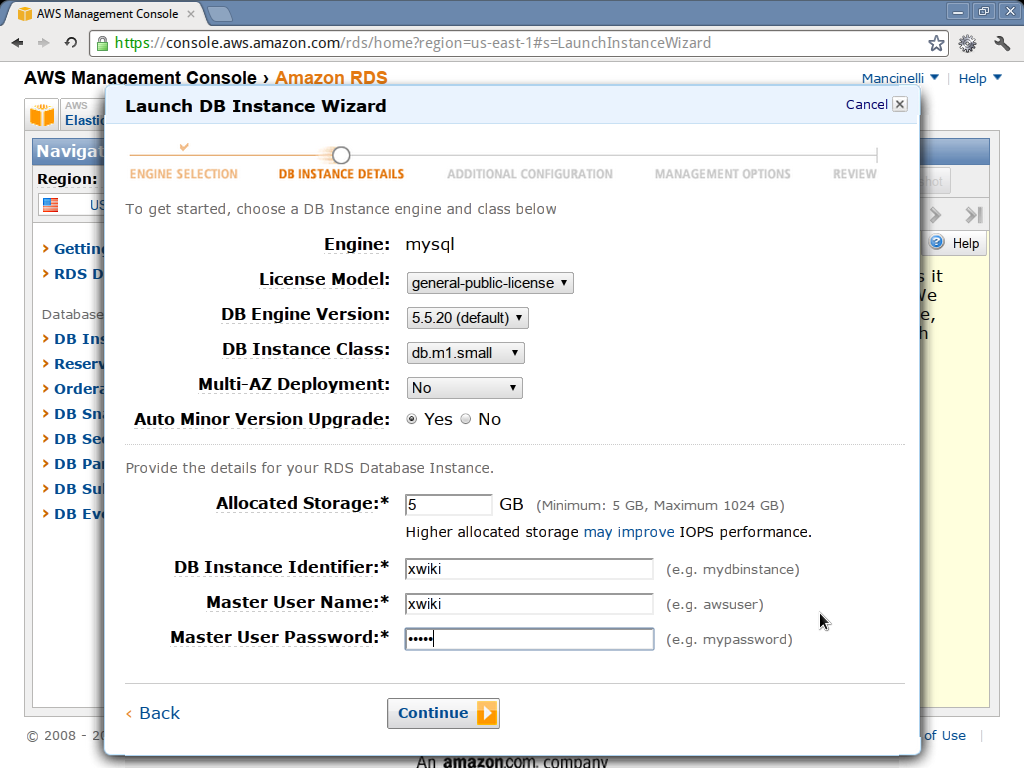
- In the DB instance details window choose the
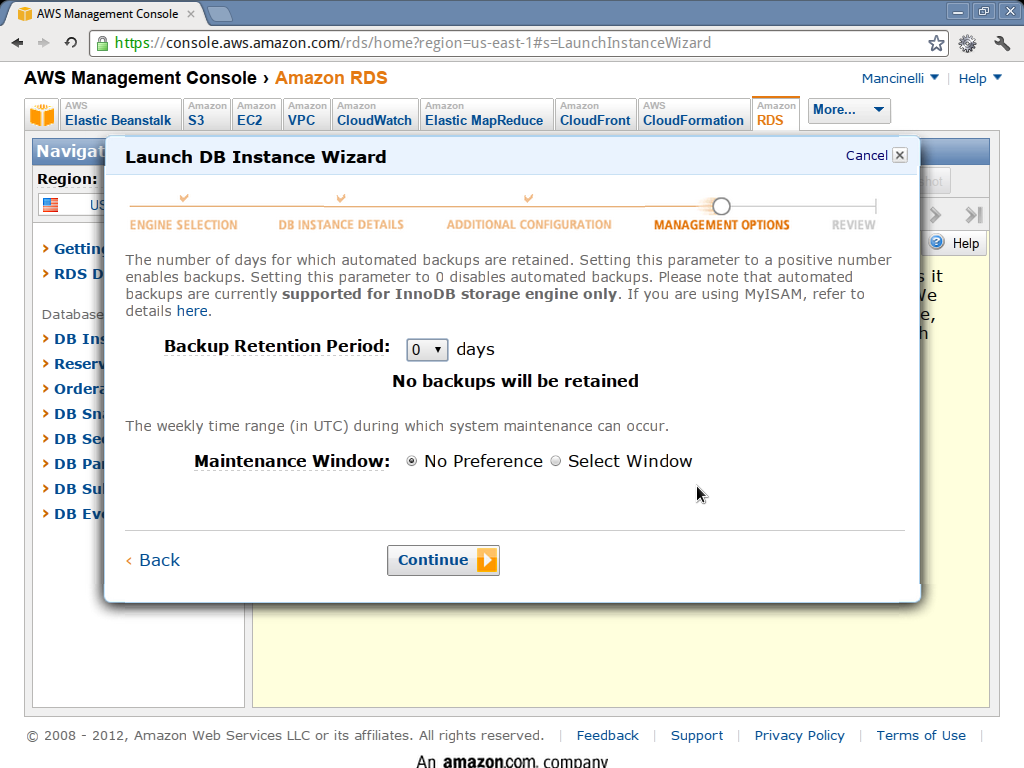
5.5.20version, and fill the other fields as you see fit. It’s important that you remember the master user name and the master user password because you will need them later. This figure shows you a possible way for filling up the needed information. If you are using the free usage tier try not to use large DB instance classes, otherwise there are chances that you will be billed. - In the additional configuration window, set
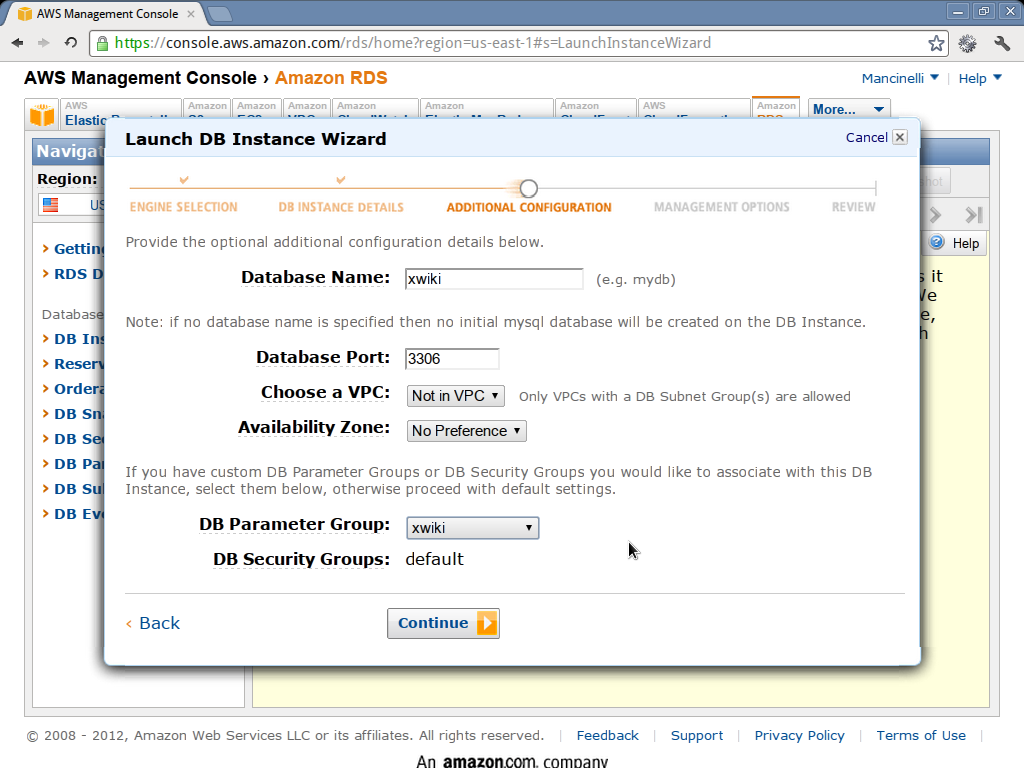
xwikias the database name and choosexwikias the parameter group to be used. This figure shows you a possible way for filling up the remaining information. - Finish the next steps.
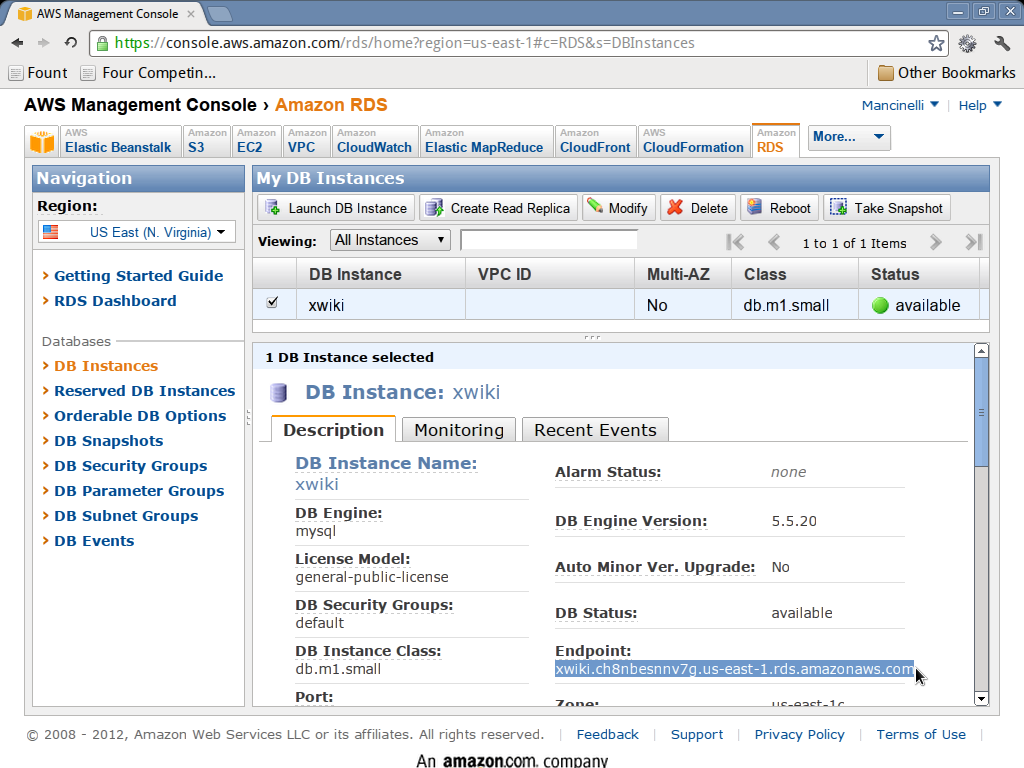
- At the end of the instantiation process you will see your database instance in the my DB instances section. By clicking on the row corresponding to the database, you will be able to find the endpoint of the created database in the bottom part of the screen. We’ll need this endpoint later to configure XWiki.
The following pictures show what you are expected to see during these phases (click on them for a larger version).

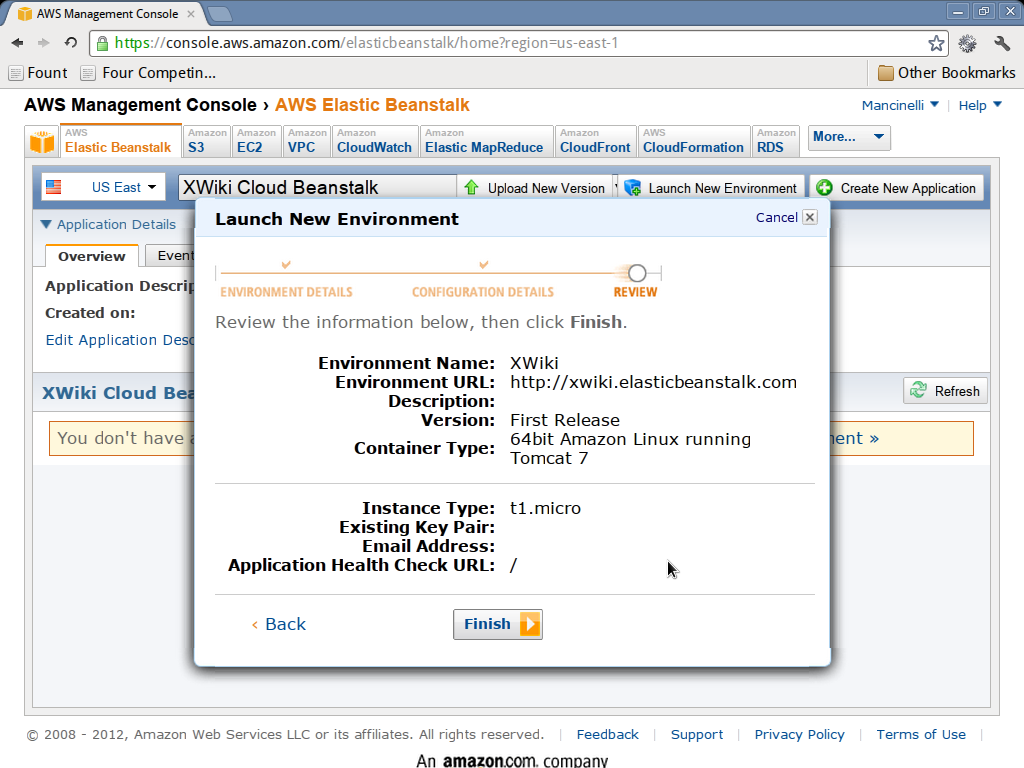
Launch a new environment
Now we can start a new environment for our XWiki.
- Go to the elastic beanstalk console
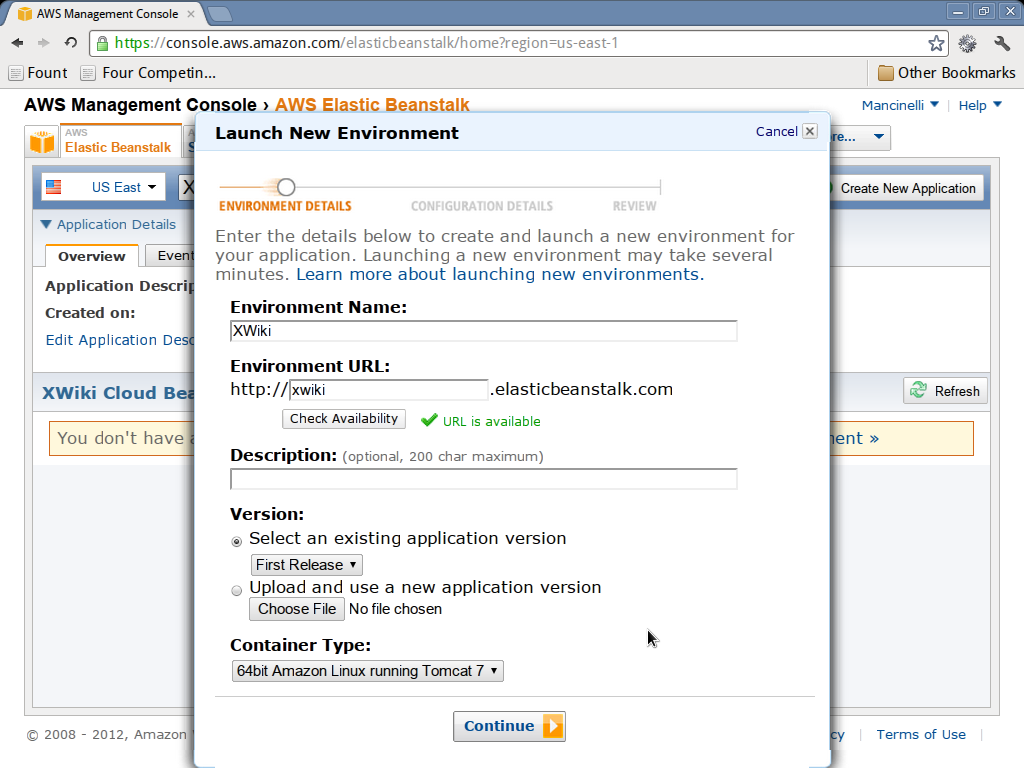
- Click on launch new environment on the top right corner. Make sure that the XWiki application you created earlier is selected in the dropdown list on the left.
- Give the environment a name and choose an URI where the web application will be published.
- Select the 64bit Amazon Linux running Tomcat 7 container type.
- Click continue.
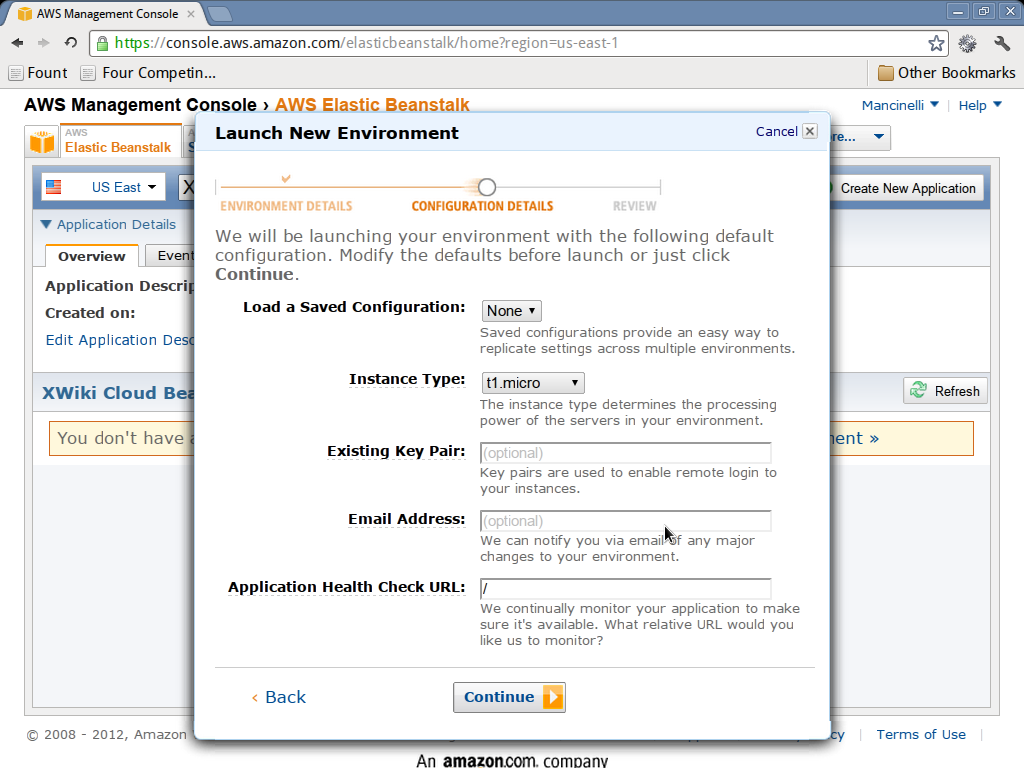
- In the configuration details page choose the parameters as you see fit. If you are using the free usage tier try not to use large instance types, otherwise there are chances that you will be billed.
- Finish the next steps.
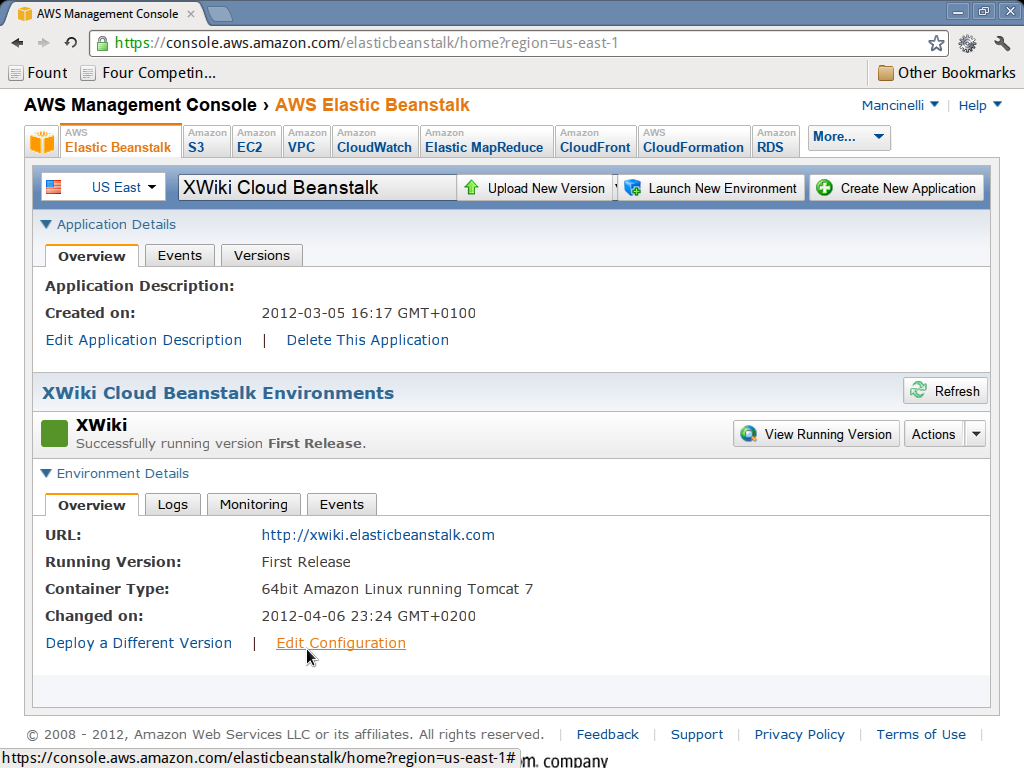
- After a while you should see the green icon and if you click on environment details you will see the link edit configuration in the bottom of the page.
We are not yet ready. We must configure the XWiki instance so that it will correctly connect to the RDS database we created earlier. For some reason it’s not possible to specify these parameters in the previous step. Instead, to do so, we need to edit the configuration of an already started environment:
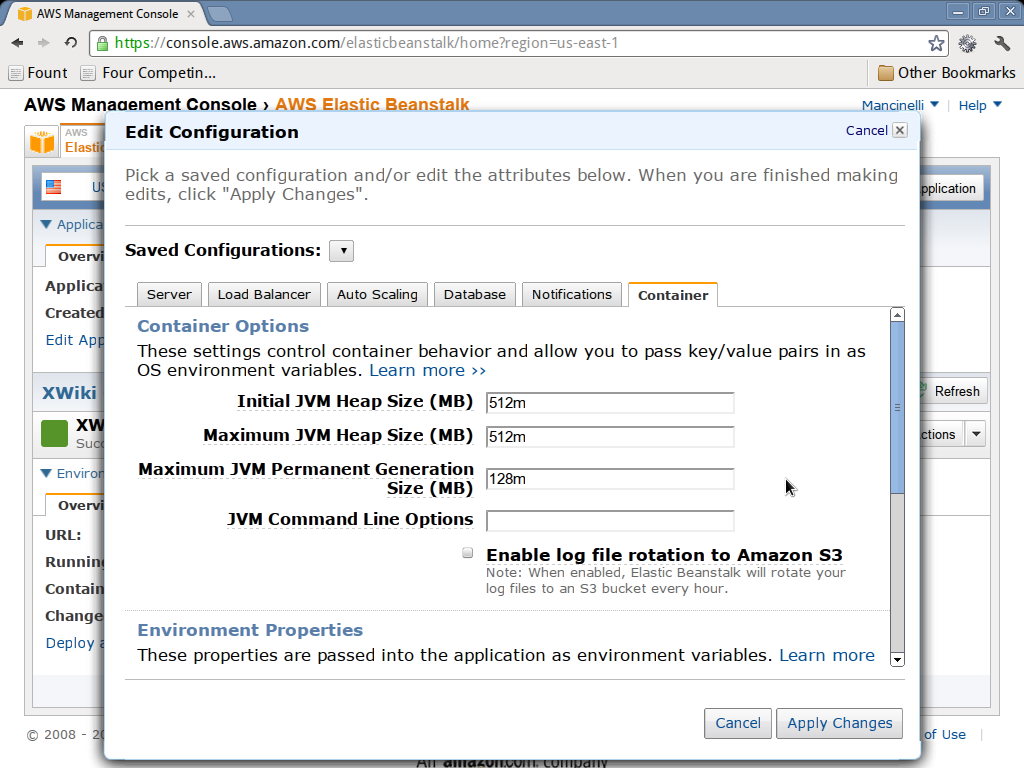
- Click on edit configuration link.
- Go to the container tab.
- Set initial JVM heap size (MB), maximum JVM heap size (MB) and maximum JVM permanent generation size (MB) to
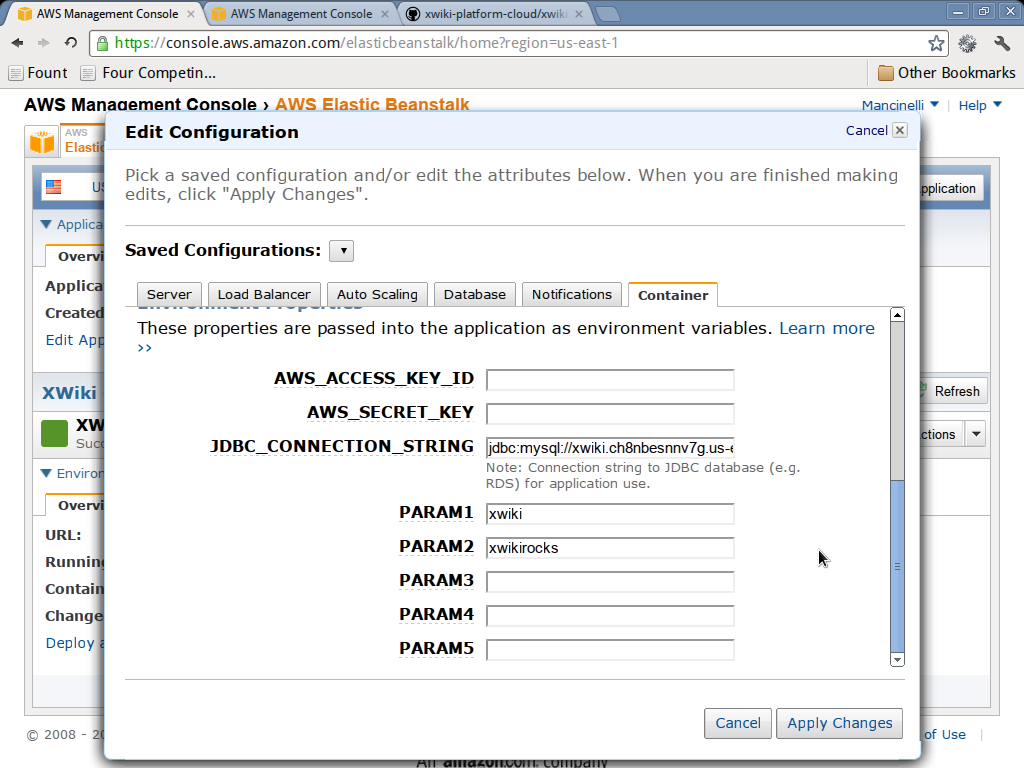
512m,512mand128m, respectively. - Set JDBC_CONNECTION_STRING to
jdbc:mysql://AMAZON_RDS_HOST/xwiki?useServerPrepStmts=false&useUnicode=true&characterEncoding=UTF-8whereAMAZON_RDS_HOSTis the endpoint of the database instance created earlier. - Set PARAM1 to the master user name you specified when you created the database instance.
- Set PARAM2 to the master user password you specified when you created the database instance.
- Click apply changes.
The following pictures show what you are expected to see during these phases (click on them for a larger version).
Connect to XWiki
The environment will restart and after a while you can connect to the URI you chose when you initially launched the environment and you will finally have an XWiki up an running on Amazon Elastic Beanstalk. You can now import the initial XAR and start working.
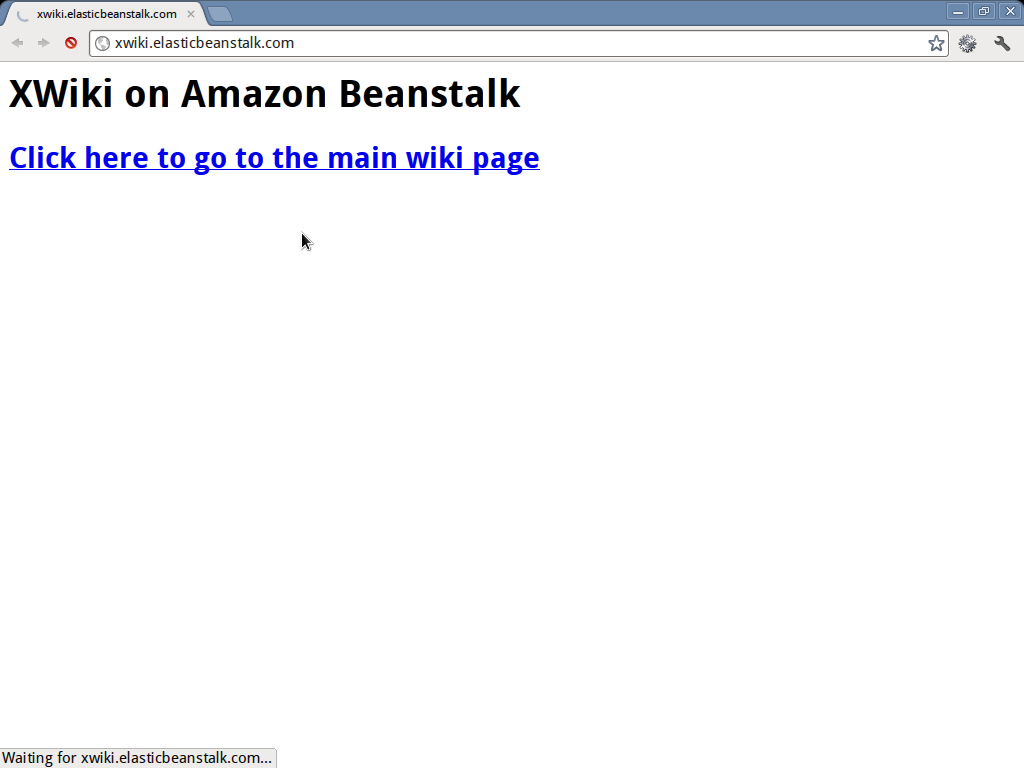

Differently from a standard XWiki deployment, the welcome page shows a link click here to go to the main wiki page. This done in order to avoid an issue with the elastic beanstalk health check.
This service, in fact, tries to ping an URI of your application (you can setup which one when you launch your environment) in order to understand if it is alive or not. Since XWiki takes some time to initialize, the first time the health check service will ping the URI it would believe that XWiki is dead and will put the whole application in an error state and shut it down.
By replacing the standard home page (which by default is an immediate redirect to the main xwiki page) with a static page we can delay XWiki initialization and make the health checker happy.
Using the S3 storage
The XWiki Platform Cloud provides the experimental support for storing attachments on a Amazon S3 compatible storage.
In order to use it you can perform the previously described steps with the following modifications:
- Use the WAR generated by the xwiki-platform-cloud-distribution-beanstalk-s3 module.
- When you configure the edit the configuration of your environment, specify in the
AWS_ACCESS_KEY_IDandAWS_SECRET_KEY_IDthe keys you will find on the security credentials page. Specify inPARAM3the S3 bucket where to store attachments and inPARAM4a namespace for your wiki. Attachments will be stored in a subdirectory corresponding to this namespace. This will allow to use a single bucket to store attachments coming from multiple wikis.